Tuesday, March 30, 2021

NUNO SERGIO SHOE MAPPING


Concept:


For this assignment, my plan was solely to create a performance to the "Borderline" song by Tame Impala.   I really liked the steady beat that the 80s type drums have in this song and felt they were perfect to have my visuals react to them. I also wanted to make sure that I implemented graphics that feel like the song.


Process:


The process that I used for this assignment was kind of straight forward, but it did require a bit of research. I started off by just mapping my shoe (which i moved and wasn't able to obtain the perfect angle again) and then attempting to automate all of the effects that I wanted to add to my medias and ISF's. I tried automating through audio frequencies and also added midi controls. Neither gave me the exact result that I wanted. I became desperate and turned to the dark world of reddit. There I was able to find a software named Vezer, which enables you to automate in a timeline type workstation similar to those that are included in DAWs. In this software, I programmed all of my mad mapper cues, color effects, and line effects. 


Jacob Hunwick Project 2: Shoe Mapping

Concepts:

In high school I was the lead designer for a skate company I co-founded. Over the years I have been collecting songs fit for promotional videos. This song, Daily Routine, is one of my favorites off the playlist. It start off very unconventionally with erratic and off-time bursts of sound. These sound bites then start speeding up until the sound is blaring.

Using the music as inspiration for the visuals, I wanted to capture the feeling of energy building up. 

Techniques:

To achieve this, most of my time went into audio controls and keyboard controls. In order to sync up the cue switches I simply linked the cue play button to my keyboard. In addition, to have control over the audio player, I linked the play and loop functions to O and P respectively. To get the lines to jump with each successive audio flare in the beginning, I altered the input and output ranges. Fine tuning so the lines accelerated alongside the audio proved tricky. In the end I got the effect I was looking for.

Execution:

For my stage I used a small table, a shoebox, a piece of styrofoam, light white fabric, and a gray sheet.

I stacked the face of the table on top of the box and let two legs rest on the floor, propped up against the wall. Next I draped the white fabric over the entire setup. Lastly, I wrapped the gray sheet over everything. The white fabric beneath the sheet adds volume and lightness to the setup. This contrasts with the weight of the shoe.

For the shoe I used my oxford Dr. Martens.

Opposite the stage and shoe I sat my pico projector on top of a box. After completing the setup I went about masking each piece I wanted to project on, and began experimenting with materials.

Once I had my 6 quads mapped and complete with materials, I broke them into two cues and began the process of syncing media elements to audio elements.


The three following images depict the construction of my stage. With a more powerful projector, I would have been able to illuminate the texture and layers of the stage. In future projects, I am looking to pick up a higher lumen projector.


My current pico projector. The low lumen makes illuminating dark backgrounds and fabrics a bit difficult. For the next project I am looking to upgrade. 


Friday, March 26, 2021

Samuel Estep Project 2: Shoe Mapping

 Concept:  Since our projects were supposed to have music to go along with them and because a lot of the music I enjoy doesn't tend to play well with algorithms that try to interpret music, I wanted to try a method of controlling the projection that I don't remember reading about.

 Technique:  In order to control my project, I did it through the power of MIDI.  Not a midi controller (I don't have one), but a midi file.  However, MadMapper doesn't have a way to use a midi file to control your project.  What I did was set up a DAW (in my case, Reaper), then route the output from a midi file through a virtual midi cable (LoopBe1), and into MadMapper.

This is what my midi file looked like for this project.  Unfortunately due to time constraints not all of the notes are used, but many are.


Interpretation: Ironically, the song I chose to use in the project (Shpongle Falls - Shpongle) would probably have worked very well with MadMapper's audio controllers due to it having a fairly strong, consistent beat.  However, I continued with my concept anyway because being able to use a midi file to control the project would give me a lot more control than I otherwise would have.  Unfortunately due to time constraints I wasn't able to make full use of the midi file I had set up, nor was I able to fully utilize my subject (the subject, being made out of leather, posed some unforeseen difficulties in the way it reflected light).  Nevertheless, I am fairly happy with the way it turned out.


Wednesday, March 24, 2021

Conner Hill Project 2: Shoe Mapping


Concept: 

    To projection map my shoe in a way that it would have audio-reactive visuals that articulate the Ivy Lab remix of Night Driving by Rhi. I wanted to incorporate visuals that have a minimal deep electronic style and red and white seemed to be colors that matched the tune.


Technique:

     For this project, I had to kind of made do with what I had, so my setup is relatively simple. I have a side table that I laid longways and then used a black pillowcase stuck to the wall as a backdrop. I set up my projector and iPhone at the end of the table so that I could get a shot that was directly at the shoe.

all of the visual content is made using MadMapper effects. I found that mad mapper layers are great for the minimal deep techno look that I was going for, and they are all customizable so I was easily able to make parts "pop" to the music. I love the line effects in mad mapper and found that my shoe had lots of stitching that would be perfect places to have some lines pumping to the music.


Interpretation:

    Ivy Lab did such an excellent job on this remix and I wanted to really articulate the deep bubbly beat and the echoey vocals. Red and white came to mind because I think that they create a really dark industrial electronic feel, and pairing those colors with minimal techy animations that are audio reactive, and carefully placed scene transitions really articulates the song.

Monday, March 22, 2021

Bayang Flores Project 2: Shoe Mapping

// Concept

    For this project, I was messing around in MadMapper when I saw the waveform option and was reminded of the Arctic Monkeys AM album from 2013. I wanted to play around with the waveform and black and white projections for this assignment. 

// Process

    Working with the mini-projector I have, I found that it's not as strong as I would have liked for it to have been. I initially wanted to try animations on the black surface of the Adidas logo on my Superstars, but found that the way I had set things up, none of the color were showing in any meaningful way. 

    Instead, I just played around with big blocky areas of my shoe and mapped the topology of the surface as best I could to wrap the light around it. Looking back now, I see that my edges are quite messy. This project was definitely a lot more difficult for me in comparison to our first assignment. 


//Interpretation

    In comparison to projecting on a relatively flat surface, I found that all the curves and creases of my shoe made it so much more difficult to get a look that I wanted. While this is what I have to submit, I want to try and improve on this on my own time for my own sake. I think, with practice, I'll be able to create something better in the future. 

    Also, my apartment has a window basically everywhere but the tight closet, so when I projected the colors weren't as bright as I would have preferred. In the future I might try projecting at night instead just so I can help my mini-projector along as much as I can. 


AJ Silverman: Project 2 Shoe Mapping


Concept

This project involved taking a shoe and projection mapping onto it with audio. I chose the song In the Night by MUZZY featuring Sullivan King.


Technique

The video that plays behind the shoe was created by hand. I drew several background and foreground frames in Procreate, then exported them as a Photoshop file to link to After Effects. In After Effects, I edited the frames together to match up with the song. I also added shaking effects and opacity changes.

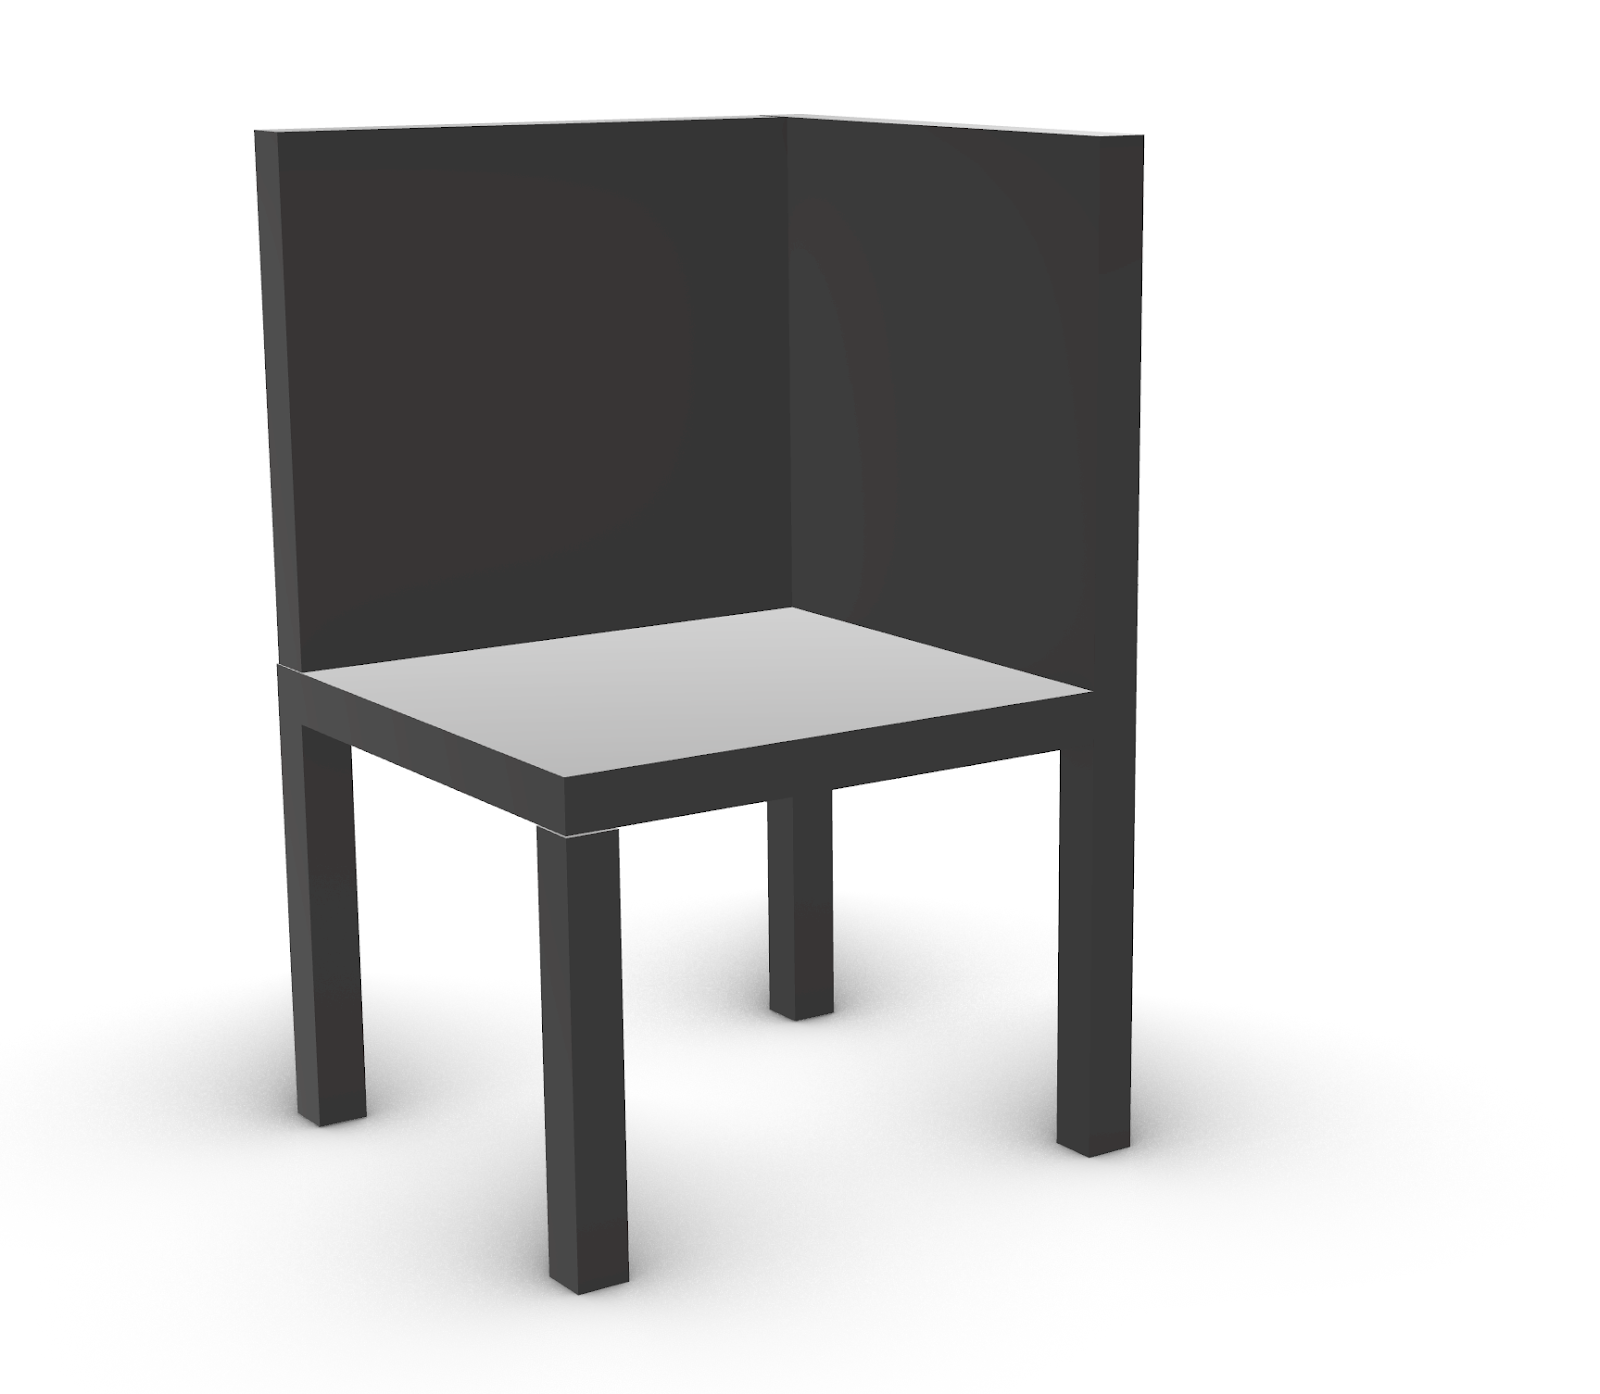
For the object that makes up the floor and walls around the shoe, I collaborated with Cameron Steele to put together. It is three LACK tables from IKEA screwed together, Cameron's design.


The 3D scanner was used to help mask out the shoe. I also had to mask out with floor and certain areas on the LACK semi-cube that were reflecting too much.

Many of the effects used on the shoe were controlled by audio.


Interpretation

The aesthetics are inspired by thriller and action movies, with some science fiction mixed in of course. I noticed that there was an unintentional effect of light reflection when the semi-cube is projected on. I decided to lean into the effect and take advantage of it, so I only projected onto one side of the semi-cube.


Safwan Chowdhury Project 2: Shoe Mapping


https://www.youtube.com/watch?v=Ja3bhjALXMM

Concept:

Upon receiving this assignment - using a shoe as canvas for a projection mapping experiment - I immediately decided to use one of my steel-toed cowboy boots. Out of all of my shoes, I would say that my boots have seen the most action and have the most interesting structure/construction. Whether in the stitching that makes its way across the shaft of the boot, or the nicks in the leather that dot the toe and heel (earned through days of work in mud and stone among other things) they seem to have more personality than the pairs of dress shoes, penny loafers, or Adidas sneakers in my collection.

Knowing that we had to produce two compositions, I decided with the first to use the projector to highlight the construction of the boot. I was inspired by the Nike Mags (the Back to the Future self-lacers) as a vision of future footwear, and decided to use the projector to give the boot some futuristic bells and whistles. I saw the composition as an opportunity to explore the aesthetic a space cowboy might show off. The song (El Anillo del Capitán Beto by Argentinian progressive rock band Invisible) chosen for the composition reflects this theme - space travel, at least. It describes the exploits of a bus driver who leaves earth on a spaceship for decades and uses an enchanted ring to protect himself from all cosmic dangers. In the song, the only thing the amateur astronaut can’t escape is his own loneliness.

In contrast, the second composition focuses on the boot itself as a thematic subject. I was inspired by the cowboy boot as a modern symbol of Southern culture, sort of. In reality, the composition was created in spite of modern Southern culture, one which has been created as a fiction (through John Wayne movies and other, more overt, propaganda) that describes modern White America as the inheritors of the great Western frontier without acknowledging the original indigenous caretakers of the land or the Black and mestizo Mexican original cowboys who worked to corral it into its early modern form. The song I used (Theme For an Imaginary Western by Mountain) reflects this. The song was originally written by British guitarist Jack Bruce, of fame as the co-vocalist and bass player for legendary band Cream. The lyrics detail the images associated with the Western film genre - wagons traveling through the frontier, sand blowing through the eyes of brave White travelers. The only mention, in fact, of the original residents of this country is "Pawnee shadow to possess him." 

So, I wanted to use the cowboy boot as a canvas to highlight the nature of the American West through images of flora and fauna. The other major element of the composition is the use of barbed wire as a jarring/disruptive element.

Process:

These compositions were created through heavy use of the masking functions in MadMapper in order to isolate the boot from the background and parts of the boot's structure from each other. After masking off the entire periphery of the projection (everything that wasn't the boot) I went on to make several projection surfaces and mask those off as well. I made 4 surfaces for the sole of the boot and more than 10 surfaces for the shaft of the boot, its straps, and other details.

These surfaces contain preset pattern/content generators built into MadMapper as well as found video content from various internet sources.

Many of the surfaces/the media within them are controlled by audio elements. This was more relevant in the first composition, where I controlled several media and the individual surface which cast a pattern over the entire shaft of the boot using audio. These audio controls are listed here, with one of them expanded for detail.

Interpretation:

I think the first composition was more interesting, but less nuanced. To be frank, I tend towards the maximal (loud sound, deep saturate color, et cetera) in my designs, and the second composition was a little less in my comfort zone. In either case, I think that my use of the MadMapper software allowed me to achieve the disparate thematic goals I hoped to.

Eduardo Garcia - Face Projection

Project 2

Using motion capture and 3d software, I was able to make a performative face projection to past performance done by Lady Gaga in the VMA's in 2013. This is one of my favorite performances and I told myself every project I make in college must pay homage to her beautiful mind. I was very moved by her tribute to David Bowie and admired all of the technology used when she collaborated with Intel I just had to try it for myself.

Through these captures you can see the work put through this project. The work flow goes as followed. I started by making the 3D model of my face by taking pictures of my face using the front and side views. Then imported those photos to the FaceGen Modeller program. Exported the obj. file and brought it into blender where I played with motion to create a visual narrative. Made final edits in after effects and then I finally projected the finished video through mad mapper.

Khadeeja Zulqarnain: Project 2 Shoe Mapping

Concepts:

I wanted to use a chunkier white shoe to have more wide surface areas, defined sections and also because I just love the aesthetic. For my music choice I wanted to incorporate some of my culture and so I was leaning towards mixing together Bollywood and some type of EDM or Trap style music together. I also wanted the final product to have contrasting patterns to match the music. Lastly, I chose to throw in the viral Tiktok reference "I ain't never seen two pretty best friends" just for fun. 


Techniques:

I created a projection setup with a table and some black cloth and a box to elevate my show to create the illusion of a floating shoe. I chose a slightly lower angle to project onto the shoe to minimalize shadow and lend to the floating effect. 


Once in the correct position I photographed the shoe as close the angle of projection as I could and used that as background guide in MadMapper to help me create the mask. I then projected my version one mask onto the shoe and first adjusted in MadMapper then tweaked the projector position. I finalized the mask by altering points in accordance to how they were being projected with some assistance from a sibling because my room setup prevented me from being able to get close enough. Once perfected I added some lines to outline and section the shoe for the composition I wanted to make. I started playing around with the scenes and cues, but quickly realized I needed to find a sound to help guide the choice of visuals. It took about a day and at first I only listened to Western (English) music before moving on to Bollywood. However neither had a good mix of what I was looking for. until I came across Dots by Dilip. It falls under the genre of dark trap and is an instrumental containing EDM and desi instruments and vocals. 

I knew I wanted to incorporate a rainbow effect so to do that I created a quad and chose a lava lamp like media, then used the cues to create different color changes and transitioned with ease out so it looked smooth. I then added strobing effect to the sections I created and made cues that activated a different one with each color and set the strobe settings to BPM. To top off this first part I added the soundwave media to react with the song. 

For the second part with the Tiktok reference I used the text generator and a sound reactive glitch grid to add color. For the last bit I wanted to highlight the logo, although it's not anything special just a generic brand, I changed the media from the soundwave mask to a strobing media and warped it to the logo and used a rainbow lerp background. I ended up using warping points to mold the medias to the sections, but this ended up limiting the media I could've used visually and so in the future I will use more masks and stay away from warping the planes as much. 

To film I used a tripod and a Samsung Note10. To play the final composition I had to set the auto play duration to a low number of BPM to make the rainbow transition fast, but it was too fast to see the first and last part. To fix this I simply played the first part manually then put my cues on auto play until it was time to play the last part manually. It took seven takes to get the timing right, but in the end I feel it turned out great. 

To make sure MadMapper heard the audio I played my sound on a tablet near my laptop mic, which changed the quality of the sound in the final video since it was further away from the phone mic. To fix this I edited the audio over the original video in post and also added in the Tiktok audio I was referencing. 


Interpretation:

The song Dots by Dilip incorporates classic Desi instruments and vocals in a dark trap style instrumental track. I chose this track because I wanted a song that both referenced my own culture's music and at the same time could be enjoyed by everyone. The composition follows the beats of the song and the rainbow colors a personal aesthetic choice that also reference the often vivid Bollywood song and dance scenes. 


Final Video:

Adan Morales Project 2: Shoe Mapping


Concept: 

I looked through my shoes and noticed that my boots had four different panels on its side and I thought it would be cool to represent different types of scenery on them that are all tied up to the song that is playing in the background. 


Process:

I began by creating a mask outline of the shoe on the first Quad in order to have the general shape of my canvas and narrow the field where the light would hit. Then, I continued to create the rest of the shapes on the shoe by using the checkered pattern and using a different color for each one in order to block out the sections.


Once that was completed, I replaced the solid color shapes with background stock videos that showcased the different kinds of scenery I had thought about. Lastly, I added the Spectrum material onto the first Quad and added an audio control onto it to change the brightness and contrast according to the music. The song is called Chlorine (Mexico City) by Twenty One Pilots.


Interpretation:

I believe I achieved my goal but it was not as ambitious as I thought it would be. While creating this scene, I thought about new ideas for upcoming projects since I did not think I had enough time to redo this project entirely.


Koby Wheeler Project 2 Shoe Mapping


Concept

For this project I used the song Weather Report by Bad Tuner. While this song was released in 2020, it has a very nostalgic feel to it that I really like. It features a woman's voice at parts where she is reporting the temperatures of different cities. From the first time I heard this song, I imagined the music video being this montage of old weather reporters from the 60's and 70's. 

Process

I found different old weather reports and news promos off of YouTube and began to splice these together to the song to create a video to be mapped onto the shoe. Once this was complete, I was able to import it into MadMapper and begin masking the shoe. I used a photo of the shoe from my phone to get a general sense of the shape, masked over the photo, then projected onto it to get a pretty close mapping. From there I live-masked the shoe to make sure there was no creep of the light onto the background. Once that was finished I added the video in and began to play with some of the line and planar mapping tools to create an interesting composition. At first, I let the video cover the entirety of the shoe, however, after running through that I noticed the aspect ratios were way too far off and many parts of the video were getting cut off. I decided, instead, to map a part of the shoe that would be a closer aspect ratio, and therefore the video in the final cut only shows on the right side of the shoe. I was able to find a nice cloud loop to use as the overall background of the shoe that I thought complimented the aesthetic nicely. I wanted some elements of the shoe to show through as to not ignore the fact that I was indeed mapping onto a shoe. So I mapped the Adidas stripes of the shoe to flash white to the beat, this really just looks like it is changing the transparency because the shoes are white. I also added a line that pulses around some distinct lines that are on the shoe to add another element to the composition. I set up a rig with my ring lights and a phone mount to capture the video of the shoe as pictured below.


Interpretation

I think this project has really good vibes with a fun flow between the song and the graphics. I love the weather, and looking at radar and weather reports, so to be able to kind of tie that into this project with media was really fun, I think this is a really fun way to experience this song in a visually interesting way and I hope you all enjoy it as much as I enjoyed creating it.

Cameron Steele Project 2: Shoe Mapping


Concept:

The song I chose was Dial Up by Barely Alive. I drew on their brand style guide to create my show.


I had been working with IKEA Lack tables recently and realized how versatile they can be for non-table purposes and I realized it would make a really nice stand for a cool backdrop for the shoe mapping project.

Process:

I measured the table dimensions and went into rhino to design a nice stand that would display the shoe and be the centerpiece of my display.


I then went to IKEA and purchased 3 LACK tables and took them to the woodshop and prepared them for the necessary modifications.


Once the centerpiece was finished I got to the projection mapping portion of the project. I started by putting the projector in front of the table and lined everything up placing my shoe in the center and making sure the beam covered the entire area. I then used a Logitech Brio to use the space scanner feature of madmapper to get a working image of the scene.


I found this crawlspace area in my parent's house and used it as the location of my scene. Once everything was setup I began making a mask of the shoe. Making both a background and foreground mask so I could easily project images to either side. I then played with sound reactivity, lines, and compound masks. 

Final:


Afifah Mazhar: Project 2 Shoe Mapping


Concept:

For this project I had decided that I wanted to capture my mapping in a slightly downward angle. For this reason I tried to find a shoe of mine that had a large, empty heel space. So that I would have space to show interesting projections even if the camera was angled downwards.


Process:

I started this mapping off by taking a picture of the shoe from the angle at which the camera would record the show and also one from where I imagined the projector would be. From there, I lined up the projector with my shoe and made sure my mappings would line up. 

From here, I started creating quads and lines within the outline that I had made and then went looking for what I wanted my mapping to look like. After I decided upon the music I would use, I created multiple scenes with different timings and made sure they would align properly with my music. From there I just filled in the sections I made in each scene so that they flowed smoothly.

Lastly, I set up the projector in the initial spot (or at least tried to), realigned the shoe, and recorded the mapping taking place.


Interpretation: 

When looking at the shoe I had chosen, I was thinking about what this shoe meant to me. It was the shoes I would wear when running around campus in my day to day life. At the same time, however, it was a heeled shoe and I felt like it gave off more of a formal look. I wanted to combine both the formal, stiff feeling of the shoe with how I viewed the shoe (as my go to pair of shoes for chilling and working). For this reason I chose the song Wannabe by ITZY. The song starts of very crisp and formal but devolves in to a more relaxed and energetic one later on. 

Vanessa Le Project 2: Shoe Mapping

Concept:
For this project, I decided to map onto my Doc Martens. Since Doc Martens were popular in the 90s, I chose to center my project around this decade. I chose a color palette filled with pastel pink, yellows, and blues, and based a few designs on the 90s.

Process:
I started off with setting up my shoe and projector. The first thing I did was create multiple masks in MadMapper. I masked the entire shoe, and then certain parts of the shoe, like the bottom where the sole is and where the stitching creates a clear separation between certain parts of the shoe.

Next, I chose the music that I wanted. To continue with the 90s concept, I chose the song “Poison” covered by Jes Macallan. It was fun and upbeat, which helped with the way I projected my designs.

Afterwards, I started collecting inspiration as to what I could do for this project. This is where I came up with my color palette, and design ideas. It was difficult to come up with ways to map creatively and still have the 90s theme be clearly conveyed. I focused on 90s related patterns with the repetition of shapes. I also wanted to incorporate the grid generator in MadMapper as it slightly represents the vaporwave aesthetic from this decade as well.

I created a few images and videos in After Effects and Photoshop to transfer into MadMapper. The videos that I created were to create a better effect on how the shoe is designed. Having the pink colored shoe with the yellow zig-zags transition to the yellow colored shoe with a smiley face, was how I incorporated a 90’s design into MadMapper. Along with the white colored backing with the shapes appearing.


Since I wanted certain parts of the shoe to have a different color, as to represent the color blocking that was also popular in the 90s, I had to create that image in Photoshop and import them into MadMapper. I took a picture of the shoe angled where the projector is and used that as my foundation. There were a few overlaps, but with the mask tool in MadMapper, it was easily removed and fixed.

 
Interpretation:
Here is the final video for my 90’s theme shoe mapping project.


Akhil Mulukutla Project 2: Shoe Mapping


 Concept:
 
Very recently I've received a pair of Nike Blazers Mids for my birthday and decided to do a ode to Nike using that very pair. The concept is based on shoe retailer displays so I displayed a Nike commercial on the box while the logo "Nike by you" is lit by a solid white quad. The shoe itself is lit by a wavy animation so that it stays bright and visible during the animation.

 
Process:
 
I had the shoe balanced on 3 boxes to reach the desired height and had my projector on a tripod to project the animations straight. The most difficult part of this besides masking out the shoe was figuring out how to get the projector to display directly from my computer. I finally got it working after messing around with the display settings. With the checkerboard pattern up and my cursor showing on the projector display it was quite easy working with real world objects. Once the display was all finished, I took multiple short videos with my phone from different angles to get a full grasp of what's projected and what's not.

Interpretation:
 
To tie the animations together I chose to use the song, Miss Alissa by the Eagles of Death Metal. The upbeat song was used in previous Nike commercials so I felt it fit well with the eye catching display. 


Sunday, March 21, 2021

Ari Aronoff Project 2: Shoe Mapping


 Concept

    For this project I decided to use a song that I used in another project last semester, the Cowboy Bebop opening theme. I chose this because I thought the assets I already had animated from last semester would look good mapped onto the setup I had made. I then had the idea of adding cuts of the original opening animation since I used a similar color palette. 

Process

    Since my tripod broke I had to rely on books and tape for this set up. I was hesitant about using the box to raise the shoe but it served as a good point of reference while creating the shoe surfaces in MadMapper. After creating the shoe surfaces I went through my old project and trimmed each comp that tied with the musical cues. I then did the same thing to original opening and imported all of the animated cuts into MadMapper. From there I tied each scene and cue to a keyboard shortcut and manually triggered the cues while recording on my phone.


This took and unbelievable amount of tries.


Interpretation


    Each of the music cues had an instrumental animation and a comp from the original theme. The instruments animated are the same as the bebop jazz instruments used in the song. The main ones were the trumpets, the drums, the guitar and the saxophones.

Project 2: Shoe Mapping; Ysatis Muniz


Concept:
For my projection, I went for a rock vibe. Shoe ads usually have an upbeat vibe and make you kind of excited, so I wanted to go for the same vibe, except with a bit of an edge. 

Process:
First I watched the MadMapper videos and put extra focus on the masking ones and lines with the bezier function. I also watched a video based on scenes and cues. After I watched these videos, I set up a brown bed sheet on my desk since I had nothing black that was big enough. I held it up with some thumbtacks and I picked my black high-top converse to use for the project. I set the shoe in the middle of the desk and then I set up my projector on the tripod.

 I opened MadMapper and had trouble trying to figure out how to connect my output to my projector. Once I got it connected, I projected a grid onto my shoe to figure out where/how close to place my projector. Once I had that figured out, I started mapping onto my shoe with masks. I created different layers which consisted of my main outline of the shoe, the bottom white part of the shoe, the circle of the converse logo, the outline of this circle, the star inside of it, the outline of this star, the two circles in the middle of the shoe near the bottom, and the lines where we can see where the shoe is sewn. I made these masks with line, the ellipse mask, and the quad mask. I also used mesh warping to conform to the shoe. After I made the masks, I had to decide which song I wanted to do my project with because I couldn't start doing a design/cue before I knew what kind of song I was associating it with. I decided to go with a more rock, upbeat type of song because that's the kind of vibe that I get from converse. I then proceeded to go through my "hype emo songs" playlist (...yup no ragrets) and was in between A Match Into Water by Pierce The Veil and Kick Me by Sleeping With Sirens. I ended up going for the latter. I then proceeded to do my cues. After I finished my cues, I decided to manually control the timing of the cues. So, before recording I decided to practice a couple of times to make sure that I got the timing right. After I finished practicing, I tried recording it on my computer, but the quality wasn't that great and you couldn't really see one of my cues. So, I tired recording with my phone, which yielded better results. However, I only have one tripod, and that was being used for the projector. Therefore, I had to hand record it, which is why the shoe was kind of moving in the video. 
Interpretation:
I wanted to make my cues go along with the song/beats, so I did a few different cues. Since thecover art for the song has a red background (and I kind of associate red with rock) I wanted to include red in my compositions. 

I also tried to do cues where there was a lot of movement because the song is pretty upbeat. For my first cue, it was only melody/the beginning of the sound so I wanted to make it calm yet suspenseful, so I did the siren movement on the shoe. It also reminded me of those old counting down transitions where the number is in the middle of the circle and then in a circular motion a clock-like hand wipes off the number and continues to the next number.

 Anyways, I thought that this motion was perfect for the beginning of the song and composition. For every hard beat (I don't know how else to describe it) I wanted to do a static cue, so I only did solid colors. For a large portion of the composition, I had a voice effect that reminds me of the music video "Do I Wanna Know?" by the Artic Monkeys. 

They're considered rock, so I wanted to do the same thing on the shoe. I also connect this voice effect to loudness, so I thought that this was perfect for the song. For one of my cues, it has flashing motions. I included this cue in the part of the song where the drums, guitar, and singing come together harshly. I included flashing at this part because it feels like adrenaline and it reminds me of being in a concert where everything is overstimulating. The following cue I also related it to being in a concert, because I included a kind of light beam that you usually see at a concert.

 For the next cue, I also included a lot of movement and a bit of flashing to keep that concert feel. For the rest of my composition I reuse the cues that I have already done. I used the beginning cue as my last cue because the song slowed down a little and therefore is more calm, and it was also the end of the chorus. Overall, I wanted my projection to give off a sort of concert feel to it.

Thursday, March 4, 2021

Akhil Mulukutla Project 1

Concepts: For this project, I went down to a nearby high school, Heritage High School and took pictures of the walls that would render well and had enough detail to learn to mask. The walls are tall and have certain details such as doors and windows that made it a bit tricky. Some of the compositions are extreme while others were a bit more subtle. I let the natural colors of the wall peek through in order to make it more realistic.


Techniques: I used quads for most of the flat surfaces in the pictures. Beyond that, I masked any doors, windows, or external detail. I also used mesh warping to conform the quads to the walls. Because I used my Iphone camera the pictures all had a slight fish-eye effect that I did my best to correct. All other tools used include opacity, color and scale to get it as neat as possible


Interpretations: For my inspiration, I used science fiction and fantasy examples. One that might be noticeable is the wall shifting composition with the two doors. I really like the scene from Harry Potter where the wall shifts away and noticed that the technique is used in many other films. My version has the wall dripping much like a hologram or rubber material making it seem more whimsical. The same technique is used in the wall with windows on it but with a different design. The first composition is the one I put a different spin on, mainly to see if the program worked with angles. I set quads on both sides of the building to see if they would work together as one, and to my surprise they worked perfectly. I applied multiple effects to this composition to get a scope of how I can layer these effects.